Our Really Cheap Scotland Trip from the United States – $330 Round-Trip Non-Stop

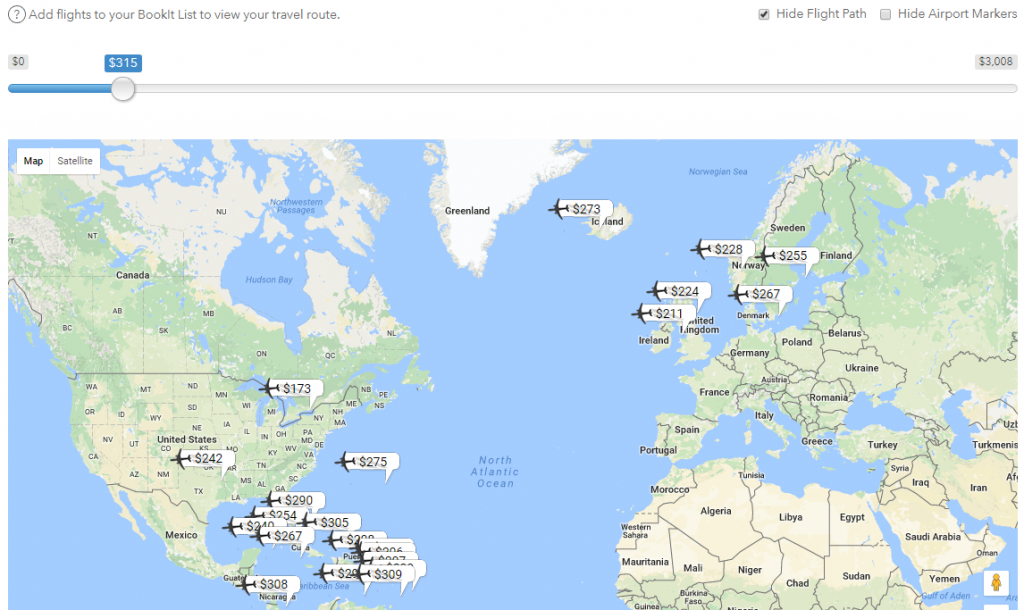
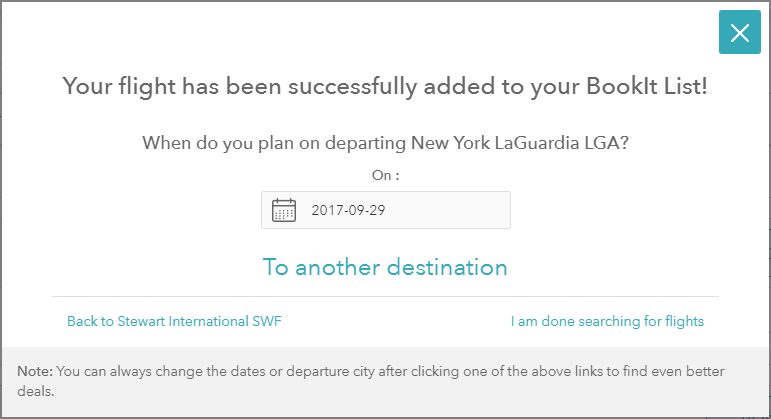
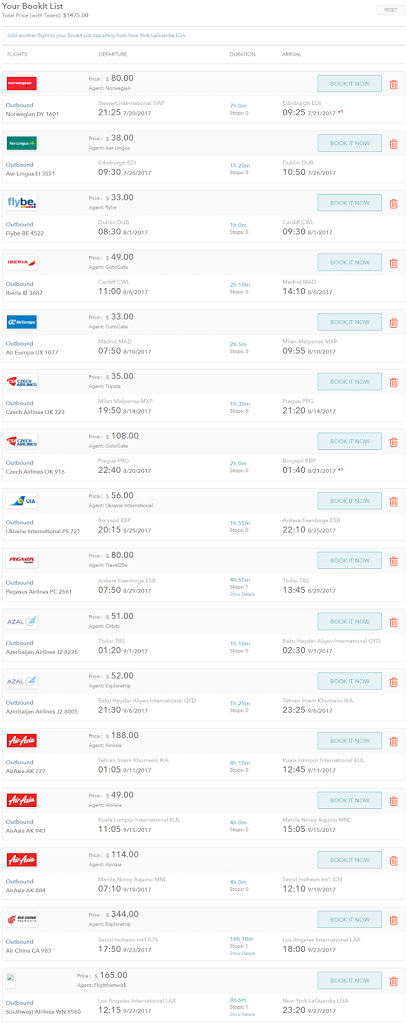
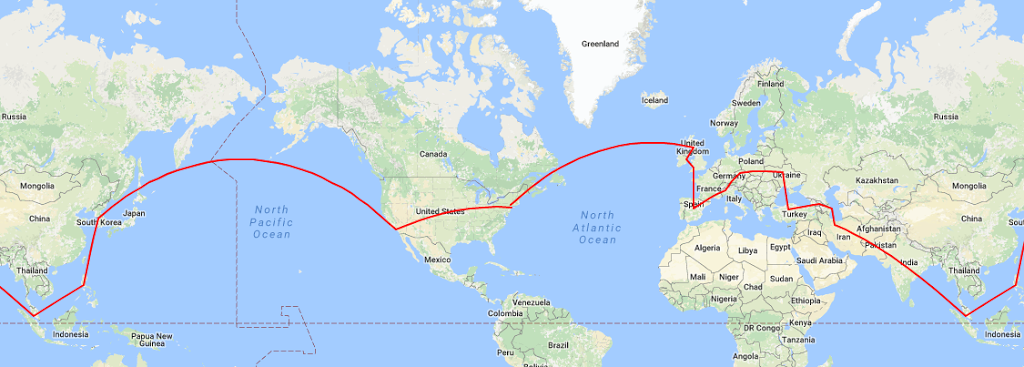
A while back, I was writing a blog entry on how to travel to a few destinations around the world for really cheap. My girlfriend read the blog entry and said, “Wow! This is really cheap. Only $330 round-trip to Scotland? We should go.” I agreed, and we booked the flight on SkySurf.Travel for one week (August 24-31, 2017). The airport we were flying from was Stewart International Airport (SWF) in New Windsor, NY. We live in Brooklyn, NY, so we purchased round-trip bus tickets from New York City (Port Authority bus station) to SWF for $40 per

Me behind the right side steering wheel

person. We rented a car for the entire week from Edinburgh Airport for the price of ‎$190 USD (we got an automatic. Manual was even cheaper!) Since this was my first time driving on the left side of the road, I decided to get the full-coverage insurance for about $200, which comes out to be $390 total for the car rental. We did a lot of driving and gas cost us ‎£70 (about $92). You’ll read more about our entire journey later on in this blog entry. Each night, we stayed at a different hotel or hostel, since we were in a different city every night. The total cost for accommodations was about $618. The total cost for flight, bus, car, and hotels was $1,840. That comes out to be $920 USD per person! That’s about the average price for round-trip flights from the United States to Europe. You can go even cheaper if you decide to travel around by public transportation and by booking really cheap accommodation, such as hostels, shared rooms, camping, or private rooms through Airbnb or other “place to stay” websites. Scotland was definitely worth the trip, especially for the price we paid!

Day 1

Edinburgh Scotland City Center

We arrived in Edinburgh, Scotland.  The first thing we did was take a shuttle bus to our car rental agency, Green Motion, to pick up our vehicle. There was only one thing we were not too happy about, and that was the long wait at Green Motion (two hours!) for our rental car. It seemed as if many people rent cars from Green Motion, most likely because of the great deal; however, the company should definitely hire some more representatives to speed up the process. Once we got our rental car, we were on our way to our hostel (Euro Hostel Edinburgh Halls) in Edinburgh.  The cost for the night (private room) was $86.65. After we settled in, we were walking to the city center, and then were suddenly stopped by a poet. He wanted us to see his show, so we decided to make our first stop at the Pilgrim Bar. It was quite an interesting show. We learned what dogging is through one of his poems. It’s British English slang, and if you’re not 18 yet, do not click on the link. After the bar, we decided to take it easy our first day in Scotland, after our long journey, so we postponed visiting any Edinburgh attractions until our last night in Scotland. We did, however, visit a Scottish restaurant. It was my first time trying haggis. I didn’t know what to expect, but once I tried it, I realized it was quite good. We then walked around the city and visited a few pubs and parks. Finally, our night ended with a bike taxi taking us back to our hostel.

Day 2

Stirling Castle
Stirling Castle

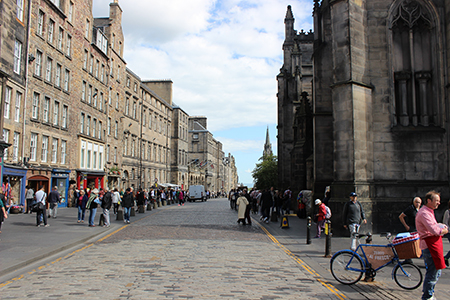
Destination: Stirling Castle! One of the largest and most famous castles in Scotland, it’s been home to Mary, Queen of Scots, where several Scottish kings and queens have been crowned. We were pretty lucky with the weather throughout our trip. Scotland is one of the rainiest places in Europe, and the only time there was a considerable amount of rain was on this day.

Stirling Castle
Stirling Castle
My girlfriend and I at Stirling Castle

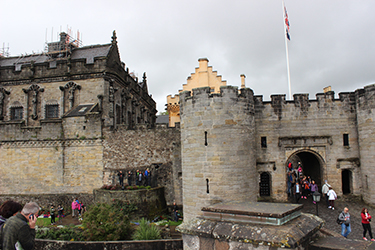
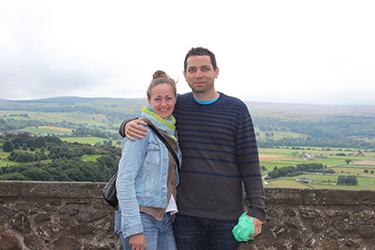
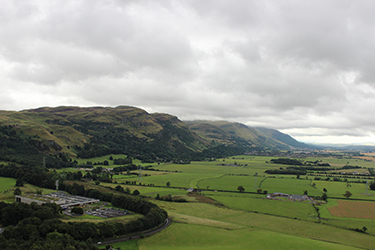
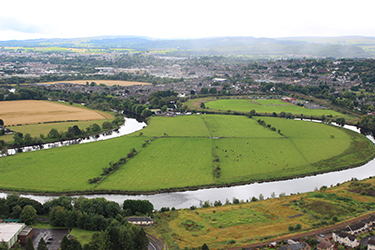
After our free guided tour at the Stirling Castle, we visited the William Wallace Memorial. In case you don’t know who is William Wallace and haven’t watched the movie Braveheart, he is one of Scotland’s greatest national heroes, leader of the Scottish resistance forces for Scottish Independence. Along with Andrew Moray, Wallace defeated an English army at the Battle of Stirling Bridge in September 1297. At the top of The National Wallace Monument, you can view the scene of Scotland’s victory at The Battle of Stirling Bridge. The views are breathtaking, as you can see from the photos below:

View from William Wallace Memorial
Top of William Wallace Memorial

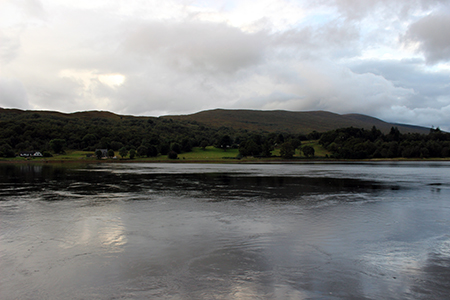
After the Wallace Monument, we made our way to Fort William to the Croit Anna Hotel, where we stayed our second night. The price for one night was $140 with a view of Loch Linnhe (“Loch” means Lake in Scottish). Once we arrived, checked in, and settled in, we were on our way to the city center for dinner. While looking for a good restaurant, we came across a booth which was selling tickets for boat cruises around Loch Linnhe. The boat cruise was leaving in about an hour and a half, so we ended up purchasing tickets. We made our way to a traditional British Fish & chips stand and ordered Haddock. There’s nothing more British than fish & chips. Freshly cooked, smothered in salt and soused with malt vinegar, then wrapped in newspaper.  Britain’s fish & chips simply cannot be beaten! After our dinner, we made it right on time for the cruise. As soon as we sat down in the boat, it started pouring rain. As we got deeper into the Loch, the rain stopped and the views were amazing.

View of Loch Linnhe
View of Loch Linnhe

After our lovely cruise, we made it back to the hotel, where we had a few drinks at the hotel bar before calling it a night.

Day 3

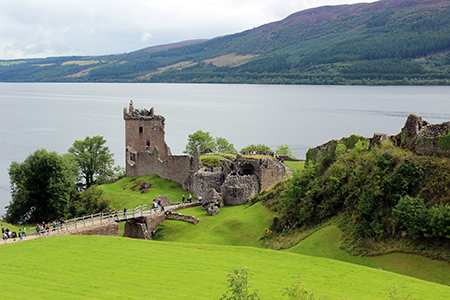
We decided to head up to Loch Ness, in search of Nessie, the legendary Loch Ness monster. Our first stop was Urquhart Castle, which played a role in the Wars of Scottish Independence in the 14th century. The castle is situated on a headland and overlooks Loch Ness.

Urquhart Castle
Urquhart Castle

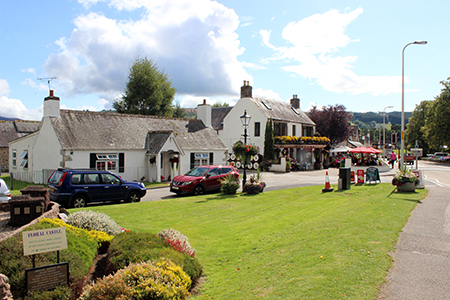
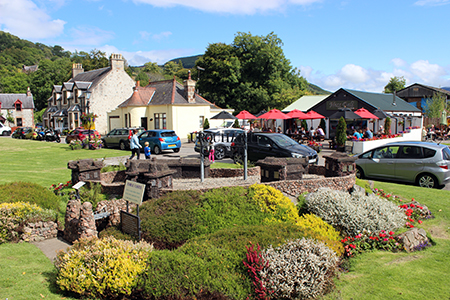
After spending about two hours at this castle, it was time for lunch, so we headed to the city center of Drumnadrochit. Drumnadrochit has a charming city center. Here are some photos:

Drumnadrochit City Center

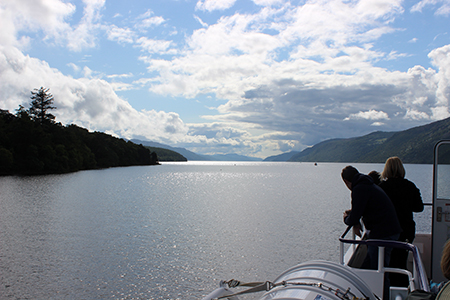
We had considered going on a boat cruise around the Loch Ness from Drumnadrochit; however, we weren’t too fond of the price or length of the cruise, so we ended up not purchasing tickets; and it’s good we didn’t! After leaving Drumnadrochit, we were on our way to our guesthouse in Inverness, and drove by Loch Ness by Jacobite – Cruises in Inverness-shire.  We decided to check out the prices, and they were both cheaper (£14) and longer (1.5 hrs)! The cruise starts from the north end of the Loch Ness and makes its way south to Urquhart Castle and back. If you want, you can get off the boat and visit the castle before jumping on a return boat a little later.

Loch Ness Boat Cruise

After the cruise, it was time to head to our guesthouse in Inverness to check in and head out for dinner. We checked into the Inverness Guest House for one night for the price of $73. Once we settled in, we were on our way to find a good Scottish restaurant in the city center of Inverness. We ended up going to the Victoria Restaurant, where my girlfriend had a pasta dish, and, I, chicken stuffed with haggis. What else did you expect?

It was Saturday night, so we decided to stay out all night and enjoy the Scottish culture & music.  Live Scottish music at the pubs, plenty of dancing, and good Scottish beer was easily found in all the local pubs and bars. This was the night of the Mayweather vs. McGregor boxing match.  I’m a fan of boxing and was hoping to watch the fight. However, it aired sometime between 4-6am Scottish time, so we decided not to stay up until the morning and to get some good rest.

Day 4

Boy playing bagpipes next to the Culloden Battlefield


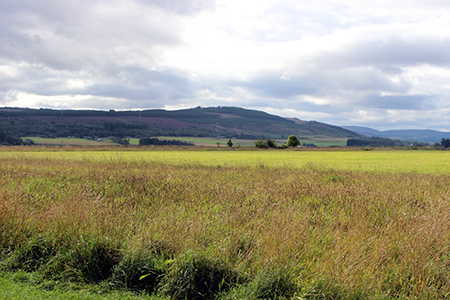
Floyd Mayweather Jr. defeated Conor McGregor by TKO in the 10th round. I’m a fan of Mayweather, so I was glad he won. Speaking of battles, the Culloden Battlefield, the site of the last bloody battle of the Jacobite Rising and the last battle on British soil was the next stop for us! We had a free guided tour around the battlefield, where the Jacobite forces of Charles Edward Stuart were decisively defeated by loyalist troops commanded by William Augustus, Duke of Cumberland. All I could do was picture myself fighting in this battle. I’m more of a rebel, so I saw myself fighting alongside with the Jacobites.

Culloden Battlefield

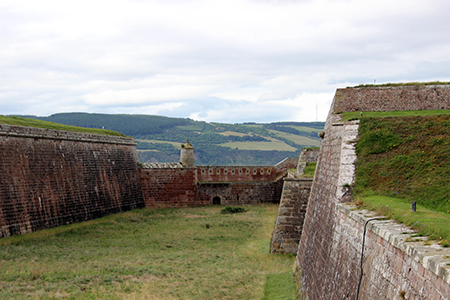
After the tour, we made our way to Fort George, which was built to pacify the Scottish Highlands in the aftermath of the Jacobite rising of 1745. The barracks are still in use as a military establishment, but much of the site is open to the public (there’s an entrance charge of £9).

Fort George, Scotland

Here’s a tip for anyone planning to travel to Scotland and is interested in visiting a few museums, castles, forts, monuments, etc. There’s a thing called the “Member/Explorer Pass”. A seven-day pass costs only £42, so if you’re planning to do a lot of exploring, it’s worth purchasing and will save you money. There are also 3-day passes. We learned about this at Fort George, and if we had known earlier, it would have saved us money.

Next stop was the Insh Hall in Kincraig, where we spent a night next to the Loch Insh in Cairngorms National Park. A single night at the Insh Hall cost us $62. After we checked-in, we had a romantic dinner next to the Loch. We then went back to the hotel to decide what to do the next day. We decided to go horseback riding in Kingussie, and then visit the whiskey distillery Dalwhinnie before our next stop to Blair Atholl.
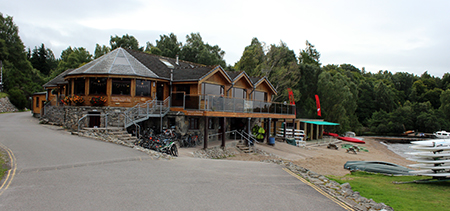
Insh Hall in Kincraig, Scotland

Day 5

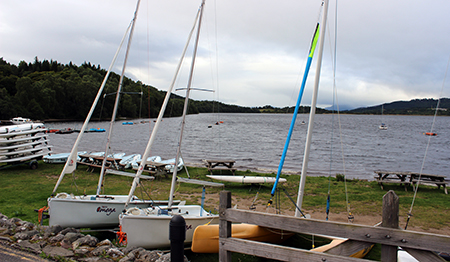
We enjoyed free breakfast with a view of Loch Insh. We had hoped to go kayaking; however, the weather was cloudy, a bit cold and windy with a misty rain over the Loch, so we decided to go horseback riding for our next adventure. After breakfast, we headed back to our room to check out. I then took a few final photos of the Loch before heading out.

Loch Insh
Loch Insh

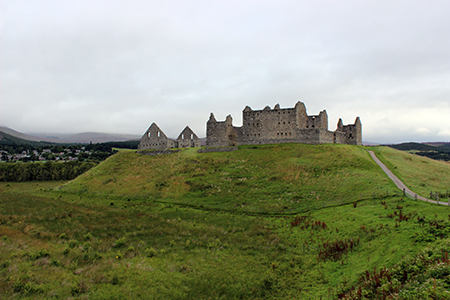
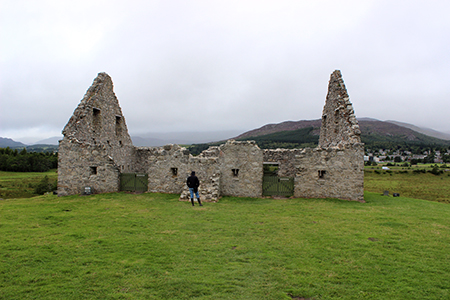
Our next stop was Kingussie for horseback riding. On our way there, we crossed paths with an old ruined barracks, so we decided to stop and take a look. The name of the barracks is Ruthven Barracks. The plaque next to the entrance reads: “After the 1715 Jacobite rising four defensible barracks were built to police the highlands. Ruthven, holding a company of infantry, was completed in 1721. Later a stable was added for the horses of Dragoons patrolling General Wade’s new military road. In 1745 Ruthven was successfully defended against a detachment of Prince Charles Edward Stuart’s army, but surrendered to his main force in the following year, when the barracks were burnt.” We then entered the barracks to explore this Scottish relic and to snap a few photos.

Ruthven Barracks
Ruthven Barracks
Ruthven Barracks
Ruthven Barracks

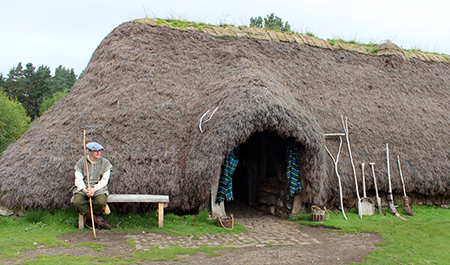
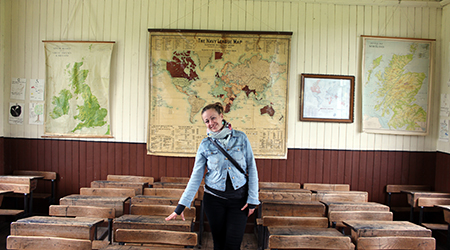
We arrived at Highland Horse Fun in Kingussie. We were there about 3 hours early, so we booked a time in the afternoon for horseback riding, and were told that, in the meantime, we could visit the Highland Folk Museum, which is located only 2-3 miles away. The Highland Folk Museum gives visitors a flavor of how Highland people lived and worked from the 1700s up until the 1960s.  Over 30 historical buildings are displayed and furnished to their time period. It’s a great place to visit if you’d like to get a feel of how Highlanders lived in the past. This museum is free, but it accepts any generous amount of donation for entry.

Highland Folk Museum
Highland Folk Museum - 1930s classroom
Highland Folk Museum – 1930s classroom

At 2pm, it was finally time for horseback riding. After touring the Highland Folk Museum, we returned to Highland Horse Fun. It started to drizzle, but that didn’t stop anyone! Everyone there was determined to ride horses, rain or shine. We mounted the horses: my girlfriend’s horse’s name was Gracie, and mine was Bella… and we were off. First, we rode around in the forest, and then, on the streets with views of the scenic Highland mountains. The horse ride was about 1.5 hours for £40 per person.

After the horseback riding we decided to take a detour to visit a Scotch distillery to learn how Scotch whisky is made in the Highlands. We visit the Dalwhinnie distillery en route in (you guessed it) Dalwhinnie, Scotland. The tour lasted about an hour and cost £12 per person. Here’s a few things I learned about how Scotch is made: The level of smokiness of a whisky is determined by the time the barley grain is exposed to the pungent smoke of peat during drying. All of the natural color observed in whisky comes from the barrel – as does many of its aromas and flavors. The majority of barrels used for aging Scotch Whisky were originally used to age bourbon in the USA. Scotch Whisky is almost always aged in used barrels while bourbon is required to be aged in new oak barrels. Since bourbon is required to be aged in new oak barrels, the used barrels get sold to Scottish distilleries for a fraction of the price. The used bourbon barrels arrive to Scottish distilleries disassembled, which are then charred in order to sterilize and remove any flavors of bourbon. Once charred, the barrel is assembled and spirits are poured into the barrel for the aging process, which must last for a minimum of 3 years in order to be called a Scotch Whisky.

Dalwhinnie Distillery

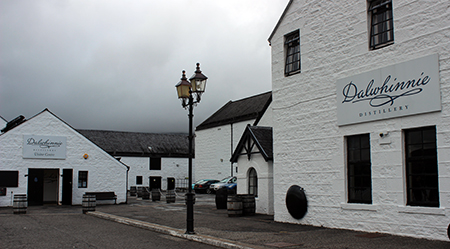
At the end of the whisky tour, we were invited for whisky and chocolate truffle tasting. Before we left the distillery, we purchased a single malt 15-year-old Scotch bottle of Dalwhinnie with a £5-off voucher that was included with the tour ticket.

Our final destination for the night was to our guesthouse, the Dalgreine Guest House in Blair Atholl, next to the Blair Castle. We were welcomed by the friendly couple, John and Rhona, who run the guesthouse. After we settled in, we decided to look for dinner at a local restaurant in Blair Atholl. Blair Atholl is a small charming town with scenic views. There is not much of a nightlife scene; however, we did find a nice pub where we enjoyed food, music, and drinks for the rest of the night.

Day 6

We had breakfast at our guesthouse, included with the price of a night’s stay, which cost us $96 total. If you’re ever looking to stay next to the Blair Castle in Blair Atholl, we strongly recommend the Dalgreine Guest House. You’ll be sure to find nice tidy rooms with awesome hosts!

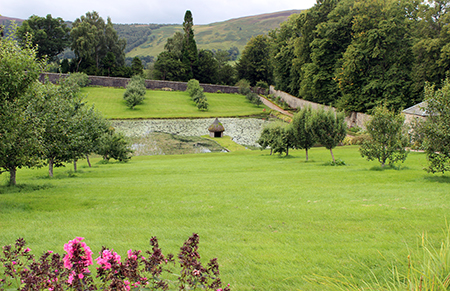
Our first stop was Blair Castle. It is the ancestral home of the Clan Murray, and was historically the seat of their chief, the Duke of Atholl. It has been and remains today the home of the Atholl family for over seven centuries. Before entering the castle, we went for a stroll around the Hercules Gardens. This unique creation of James Murray, 2nd Duke of Atholl, and his gardener, John Willson, took more than ten years to complete, between about 1744 and 1756.

Hercules Garden - Blair Atholl - Blair Castle
Hercules Garden – Blair Atholl – Blair Castle

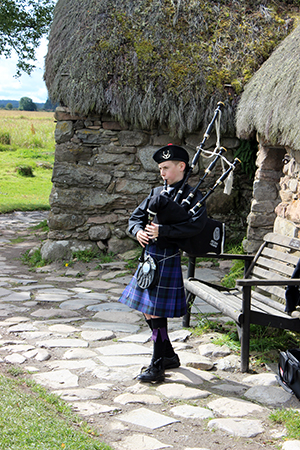
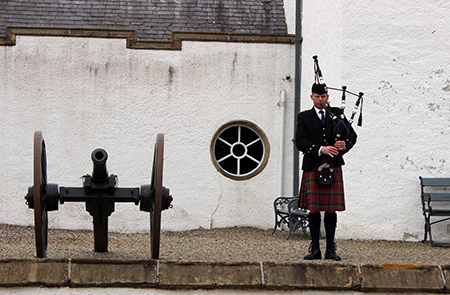
After the Hercules Garden, we made our way inside the Blair Castle to see how the Dukes have lived. Today, you can rent out the Blair Castle if you’re planning a wedding. Every so often, a man dressed in Highland wear will play the bagpipes outside the castle.

Man in Highland wear playing bagpipes in front of Blair Castle

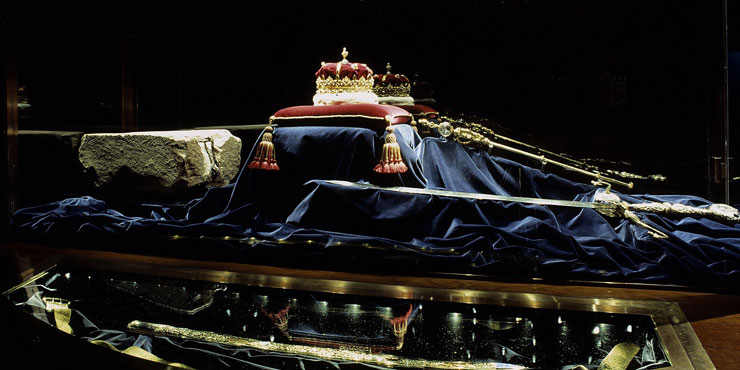
We then made our way to Perth, to visit the Scone Palace. Scone was for nearly 1,000 years the crowning-place of Scottish kings and what used to be the home of the Stone of Scone. This stone is an oblong block of red sandstone that was used for centuries in the coronation of the monarchs of Scotland, and later the monarchs of England and the Kingdom of Great Britain. On Christmas Day, 1950, four Scottish students from the University of Glasgow removed the Stone of Scone from Westminster Abbey in London and took the stone back to Scotland. In April 1951, the police received a tip-off and the stone was found. The Stone was returned to Westminster Abbey in February of 1952. It was then returned to Scotland to Edinburgh Castle on November 30, 1996, where it currently remains alongside the crown jewels of Scotland in the Crown Room. If you’re ever planning to make a visit to the Scone Palace, you’ll find lots of peacocks roaming around the gardens. You’ll also find a garden maze where in the center sets a bronze statue in a fountain.

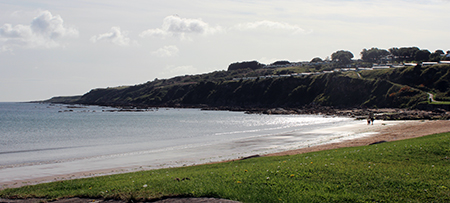
Next destination: St. Andrews via Dundee and the Tay Road Bridge. This is where we spent our 6th night in Scotland. We had a lovely stay at St. Nicholas Farmhouse B&B for $79. This was a bed and breakfast, so breakfast was included. We settled in and first thing we did, as usual, was look for a place to eat. St. Andrews is on the coastline of the North Sea. We walked by the panoramic shore to get to the city center, which is made up of only three streets: North, Market, and South street. St. Andrews is a small town, most notable for Scotland’s first university found in 1413, where Prince William attended and met Kate Middleton; as well as for St. Andrew’s Castle & Cathedral, and golf. Our first stop was Forgan’s St. Andrews. They had a special for Tuesday night, which was either a 3-beer or wine taster board at a reduced price, so we decided to stay and have some tasty appetizers with our taster boards. I recommend going here if you’re looking for place to go out for food & drinks in St. Andrews. The food looked and tasted delish. We decided to stay in the city center for a night out of fun & drinks in St. Andrews.

St. Andrews North Sea Coastline

Day 7

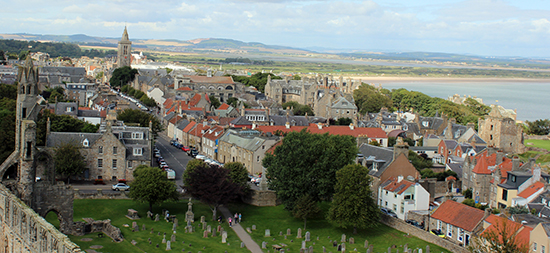
We enjoyed our breakfast at the St. Nicholas Farmhouse B&B with a pleasant couple from Germany. We then made our way out to St. Andrews Castle, which was a bishop’s palace, a fortress and a state prison during its 450-year history. It sits on a rocky promontory overlooking a small beach called Castle Sands and the adjoining North Sea. The principal remains of the castle are a portion of the south wall enclosing a square tower, the “bottle dungeon,” the kitchen tower, and the underground mine and counter-mine. We followed up with a visit to the Cathedral of St. Andrew, which is nearby the castle. The cathedral was built in 1158 and became the center of the Medieval Catholic Church in Scotland as the seat of the Archdiocese of St. Andrews and the Bishops and Archbishops of St. Andrews. It fell into disuse and ruin after Catholic mass was outlawed during the 16th-century Scottish Reformation. During your visit, you can climb to the top of St. Rule’s Tower, which has a captivating view of St. Andrews.

View from the top of St. Rule’s Tower

After touring the cathedral, we headed back to Edinburgh for our final night in Scotland. Our pleasant host told us to take a scenic route of the sea and to cross the new bridge, the Queensferry Crossing, which had just opened the day before. We stopped for a coffee in a shop with a lovely view of the sea from its backyard patio in Crail, Scotland; and then continued our journey to Edinburgh. Once we arrived at the bridge, we were stuck in our first and only traffic jam in Scotland, most likely because many people wanted to drive across the newly opened Queensferry Crossing. We then drove to the Edinburgh airport to return our car, since we didn’t need it anymore, and then took a tram to the Edinburgh city center.

Crail, Scotland coffee shop

We checked into the High Street Hostel for $82 (private room). Our room was called the “Will & Kate” room. We then went out for dinner, and then at 8pm, we met with a group of people in the city center to go on a pub crawl. The pub crawl was a tour of about 6 pubs in Edinburgh with a group of tourists from around the world. We met people from Argentina, Spain, Germany, the United States, and other countries. The pub crawl costs only £7 per person and includes a drink/shot in each bar. There was lots of cheer and dancing.

Day 8

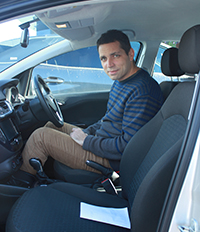
Our final day in Scotland! We booked a tour for 10:30am at Mary King’s Close, which is a historic close (alleyway) located under buildings on the Royal Mile, in the historic Old Town area. It took its name from one Mary King, a merchant burgess who resided on the Close in the 17th century. Our tour guide was excellent and we would definitely recommend this tour to everyone.

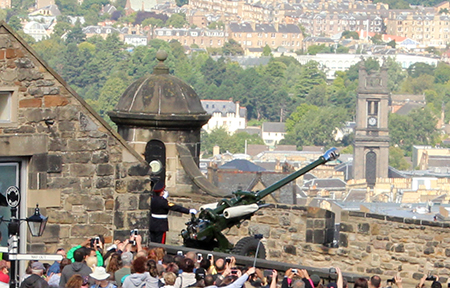
Finally, we ended our adventure with the famous Edinburgh Castle! Our free guided tour started at 12:30pm, which lasted a half hour; just in time for the One O’clock Gun! The firing of the One O’clock Gun dates back to 1861 when it allowed ships in the Firth of Forth to set the maritime clocks they needed to navigate the world’s oceans. Before leaving the castle, we made our way to the Crown Room, to see the crown jewels, and the Stone of Scone! What a magical moment to conclude our trip in Scotland! It was then time for us to return to our hostel, grab our luggage, and walk to the tram stop. We got to the airport 3 hours early and immediately started to reminisce about our unforgettable adventure.

Firing of the One O'Clock Gun - Edinburgh Castle
Firing of the One O’Clock Gun – Edinburgh Castle
Stone of Scone - Crown Room - Edinburgh Castle
Stone of Scone – Crown Room – Edinburgh Castle

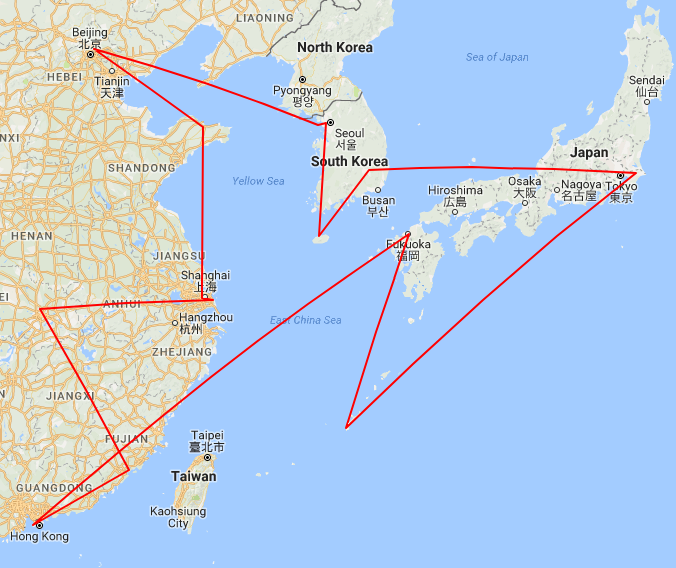
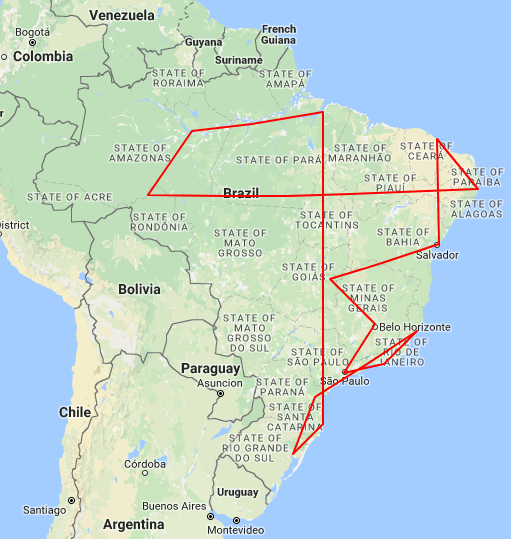
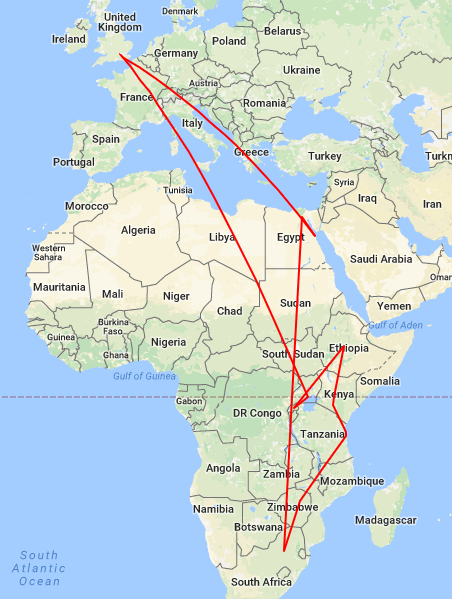
Here’s a visual map of our entire travel route in Scotland:

Our Scotland Car Trip Route

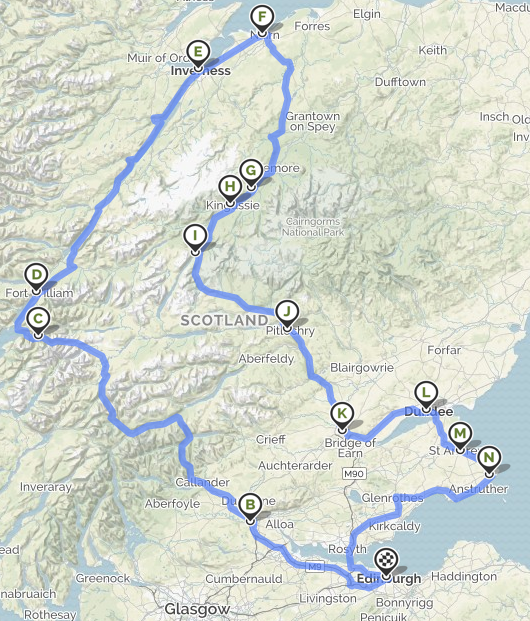
MapQuest directions: http://mapq.st/2f5UVrx

As you can see, we took an awesome trip for less than $1,000 per person (that excludes food & drinks, entertainment, and tours), and it’s possible to pay even less. If you plan on doing a lot of touring around Scotland, it’s a good idea to purchase a Member/Explorer Pass to save you money. The flight cost us only $330 per person with taxes included, which was purchased at SkySurf.Travel. You, too, can create your own inexpensive adventure by purchasing a cheap flight at SkySurf.Travel. If you do go on a trip where you’ve purchased a flight from SkySurf.Travel, please send me your story, photos and/or guest blog, and I’ll happily post your adventure on this blog.

Whit’s fur ye’ll no go past ye.

Safe journeys!

Gregory

http://skysurf.travel/

How SkySurf.Travel Is Different from Any Other Airfare Finder Website

When presenting SkySurf.Travel, often I get asked the question, “How is SkySurf.Travel different from any other airfare finder website, such as Kayak, Skyscanner, or Google Flights?”  That’s a great question.  Why would anyone choose SkySurf.Travel over Skyscanner, Kayak, or Google Flights?  In this blog entry, you’ll learn how SkySurf.Travel is different from any other flight ticket site on the web, and why you should take advantage of it to book your flight tickets.

What’s most notably different on SkySurf.Travel compared to any other flight ticket website, is that there’s no input field to enter in a destination.  This is done on purpose, so that travelers with limited funds, or travelers seeking the most economical multi-city flight route, can see which travel destination options they have.  If you have a set plan with exact travel dates, SkySurf.Travel may not be the best tool for you to book flights.  However, here are some cases where SkySurf.Travel would be an excellent resource for booking your flights:

  • You have a budget set aside for flights, and want to see what your flight ticket options are.
  • You want to travel to a few cities around the world, a continent, or country, and want to build the cheapest possible multi-city flight itinerary.
  • You’re flying around the world, and whenever you’re ready to depart the city you’re in, you can see what your cheapest options are.
  • You just want to see if there are any travel deals for the dates you want to travel, or if you’re flexible, choose ‘anytime’ or select the month you wish to travel. For example, there can be round-trip deals to Europe from the United States for $200-$300.

“Kayak, Skyscanner, and Google Flights already have map explorers for finding great travel deals.”  Yes, this is true, but SkySurf.Travel is specifically built for building the most economical flight itinerary. Here’s what SkySurf.Travel offers that the aforementioned websites do not:

Try for yourself and see where your budget can take you.  Perhaps a cheap flight to a lovely beach island, or the mountains?  Wherever your dream destination may be, SkySurf.Travel can help you find great flight deals to many destinations around the world.

How to Fly with a Bike: The Most Convenient and Affordable Way

With more travelers preferring to tour the world with their bikes, several online tools have been devised to help travelers find the best deals, and one such airfare deal finder tool is the SkySurf.Travel which is a portal to help you find cheap plans to fly with a bike. However, it is worth noting that every airline has its own policies that include their fees and additional requirements.

What You Need to Know

  • Airlines have different rates that apply to anyone who intends to fly with a bike on a plane; some may be kind enough to include it in your baggage allowance.
  • The packaging has to be properly done either in a bike bag or a bike box. The type of box to be used may be determined by the airline regulations.
  • You may need to disassemble the bike
  • Let the airline know in advance that you will be traveling with your bike.

Taking a bike with you on a plane involves sourcing the packaging, packing, protecting and unpacking the bike. Going through the packing and the unpacking sequence can be quite tedious and this may prompt you to look for something simple and affordable,which leads us to the question: what is the best way to fly with a bike?

Using a plastic bag

You should consider using a clear plastic bag over a cardboard box. Using a clear plastic bag gives your bike protection because of its visibility to those handling it. They will perhaps be more careful when they can see what is in the plastic bag.

Reasons why you should use a clear plastic bag.

  1. Simplicity

Being in a plastic bag, you can think of your bike as one package. The CTC plastic bike bags have been specifically designed for packaging, and they can be ordered from a nearby store and are reusable. To reuse it, you just slide the back in, fold it down and tape it in.

  1. Quickness

The amount of time that you need to do the packaging (or unpacking) should not be more than 20 minutes on either end of the flight. Using a bike box usually takes more time and may require that you take the bike apart, unlike the clear plastic bag that keeps the bike entirely intact.

  1. Affordable

With proper planning, getting a CTC plastic bag should not cost you an arm and a leg, and you can make one on your own if you can get a good source.

  1. Handling and Protection

When the luggage handlers are able to see what is in a clear bag, they are more likely to handle it with more care and in an appropriate manner. This kind of packaging also ensures that your bike does not end up being stacked with other luggage when moving through the hold area.

Packing the bike in a plastic bag

Using a clear plastic bag for packaging requires that you know a little about disassembling the bike. Check what your preferred airline says about flying with a bike, most will require that the handlebars be turned parallel to the bike frame, tires be deflated and pedals removed or turned inwards. To further protect the front derailleur, you can add some extra padding to it or disconnect it from its frame, lower the saddle, and secure the front wheel.

  1. Remove the pedals and turn the handlebar parallel to the bike’s frame. You can also lower the saddle at this stage.
  2. Secure the front wheel by using a good rope or a spare line. Make it tight so that it remains firmly secure
  3. Remove the derailleur carefully making sure that you do not damage it or the frame itself. You can improvise on better ways to secure the derailleur when in transit by use of a duct tape.
  4. Place the bike inside the plastic bag and cover it nicely to make sure that it is well protected. Use a thick duct tape in a way to make sure the bag is well secured and there are no snags.

Does it make sense?

Baggage handlers are, of course, humans and they are more likely to handle your bike more carefully than if you decide to fly with a bike packed in a cardboard box with or without labels on it. What are the chances that the best mountain bike under $1000 could just be stacked below the weight of suitcases? Love your bike and use the most convenient and affordable way to fly with your bike to any destination of choice safely.

And the tips?

When you land, check on your bike for any possible damages. Typical airlines must have time limit in which you can file any damage claims. Look out for the privileges that may be given to specific ticket holders, for instance, why pay to fly with a bike when first class ticket holders have a free bike pass? Ask; it doesn’t hurt to know.

If your choice of flight is expensive, then it would be wise to consider shipping your bike as a parcel via courier services. And finally, if you are not confident about disassembling your bike, a local bike shop can do the packaging for you at a fee, of course.

How to Air Travel with Your Bike

How to Air Travel with Your Bike

As a biking enthusiast, you wouldn’t want to leave your bike behind, even when traveling to a faraway country, right? The good news is you don’t have to by choosing from the many cheap flights available, and SkySurf.Travel will make things easier for you. The portal does not only allow you to browse the cheapest air ticket deals, it also allows you to book all your flights in one place.

Perhaps you are asking yourself this question most cyclists ask themselves, “How can I make sure my bike arrives at my traveling destination, upcoming competition or sport safely?”

There are various issues you have to consider if you are thinking of flying with your bike, whether it’s a mountain bike or another type of bike.

a. Level of Protection

The first issue is how you are going to make sure your bike is safe. What level of protection is necessary for your bicycle? This question should drive you to choosing the right bag or container for packaging your bike so as to avoid damage during travel. Here are the answers to that question.

Almost every airline requires passengers who are traveling with their bikes to package them for check-in. That gives you three solutions to transporting your bike:

  1. Cardboard Box

This is probably the cheapest option anyone could think of when it comes to traveling with their bike. You can get a cardboard at little to no cost, which is why most people think of this when they want to transport their bikes. The cardboard is lightweight, can be stacked easily and gives additional space to store other items. After arrival, you can also recycle the box.

However, a cardboard box has one downside: it is unstable. In addition, if the box happens to be mishandled at the airport, it can be seriously damaged leaving little or no protection to your treasured bike.

A cardboard box also cannot give maximum protection to your bike on its own. To protect your precious bike, you will need to bubble wrap, cable tie, pipe insulate and tape it, which will cost you some extra bucks. The process is time-consuming as well. Note also, apart from low protection, storing your bike in cardboard boxes requires you to know a thing or two on how to dismantle it. To sum it up, this option requires you to have mechanical skills and provides your bike the least protection.

  1. Bike Case

Acquiring a rigid bike box is the most expensive but safest option of transporting your bike. This case gives the highest protection to your bike by preventing knocks and shocks from harming the contents. However, like any other item, these boxes have their downsides. The bike boxes can be heavy, adding to the charges you will have to pay to transport your bike. If you choose to fly with your bike in a bike box, then be sure to check the weight limitations so you won’t be charged for extra weight.

  1. Bike Bag

These are normally low weight, fairly priced and very functional. Basic bike bags will require you to dismount the rear derailleur, pedals, handlebars, wheels and the seat post. Here you will need some mechanical skills as well. If you are not so sure, get a professional mechanic to help you.

b. Weight restrictions

As you have seen above, the bag type matters in determining the total weight you are going to be charged for. Most airlines will not charge you luggage fee if your bike does not exceed the weight restrictions of a usual bag. However, if you choose to fly with your bike in a larger or overweight bag, you will be charged. The weight that most airlines seem to have settled on for non-oversize luggage and usual bags is 62 dimensional inches, which is the summation of length, width and height, and less than 50 pounds. Below is the cost of transporting a bike in various airlines:

  • Frontier Airlines: If your ticket is classic or classic +, you will not pay for the transportation of your bike. However, if you are going to travel in the economy class, you will pay a regular fee of $20 for non-oversize bags.
  • Delta Airlines: You will be charged $150 per bike
  • United Airlines: For a maximum weight of 50 pounds, you will be charged $100
  • American Airlines: You will pay $150 per bike for a maximum weight of 70 pounds and 126 inches (dimensional). For less than 50 pounds and 62 inches, you will pay a regular fee of $25 for your first bag.
  • JetBlue: You will pay $50 each way for a maximum weight of 99 pounds per bag. If the weight of your bag is less than 50 pounds and 62 dimensional inches, you will not be charged.
  • US Airways: You will be charged $200 each way with a weight of 50 to 70 pounds. If it’s your first bag and less than 62 inches, you will be charged $25.
  • Southwest Airlines: Your baggage will be stored in free checked luggage compartment and you will not be charged if it’s less than 50 pounds and 62 dimensional inches. Excess weight will result in additional charges.

For the best cycling experience, best fixed gear bikes are ideal. So, consider transporting such so you can enjoy your stay outside your area or country as you discover the terrains of your destination country.

How to Fly with a Bike: The Most Convenient and Affordable Way

Travel East Asia by Plane for Really Cheap: 12 Cities (3 Countries) for Under $750 in One Trip

In this blog entry, you’ll learn how to use the online airfare deal finder tool SkySurf.Travel to build the most economical travel itineraries to travel around East Asia by plane (or anywhere around the world). East Asia, also popularly known as “the Far East,” is home to about 1.6 billion people.  The region contains world metropolises such as Hong Kong, Tokyo, Seoul, and Shanghai, endless archipelagoes at the edge of the Pacific Ocean, as well as vast plains and sky-high mountains.

Map of East Asia
Map of East Asia

The countries that make up East Asia are as follows:

  • China – The world’s most populous country and one of the oldest civilizations, with a vast array of cultural and natural treasures among the frenzied development
  • Hong Kong – A former British colony considered by many as Asia’s World City. Come for the skyscrapers and shopping and still find beaches and sleepy villages on car-free islands
  • Japan – Isolated until the 19th century, now the world’s third largest economy with both technology and tradition to offer
  • Macau – A former Portuguese colony with liberal gambling laws and beautiful colonial architecture in its UNESCO listed historical city center
  • Mongolia – A nomadic land of vast spaces and mystic Buddhism
  • North Korea – The world’s most secret society and last remaining outpost of the Cold War
  • South Korea – A hotspot of innovation and pop culture and, in many ways, the opposite of its northern neighbor
  • Taiwan – The remnants of the Republic of China, and an island of sharp contrasts: lush mountains, skyscrapers, gentle tai-chi and delicious food

Some popular tourist destinations in East Asia include:

  • Altai Tavan Bogd National Park – Home to Mongolia’s eagle hunters and highest mountain
  • Great Wall of China – Longer than 8,000 km, this ancient wall is the most iconic landmark of China
  • Mount Fuji – Iconic snow-topped volcano, and highest peak in Japan (3776 m).
  • Panmunjeom – The only tourist site in the world where the Cold War is still reality
  • Tibet – Mysterious place in the Himalayas with a unique local culture, considered by many to resemble the mythical Shangri-La
  • Seoraksan National Park – South Korea’s most renowned national park and mountain range
  • Taroko Gorge – An impressive 19-km-long canyon situated near Taiwan’s east coast.  The area of the gorge is also identified as Taroko Gorge National Park
  • Yakushima – A Japanese island off the southeast coast of Kyushu next to Tanegashima and north of Okinawa. Officially a part of Kogoshima Perfecture, it is on the UNESCO World Heritage List. Though not too well-known outside Japan, Yakushima is a popular destination for Japanese tourists, which explains why the infrastructure (hotels, restaurants, transportation) is so good
  • Yungang Grottoes – Ancient Chinese Buddhist temple grottoes near the city of Datong in the province of Shanxi. They are excellent examples of rock-cut architecture and one of the three most famous ancient Buddhist sculptural sites of China

Plane travel is the fastest way to travel between countries in East Asia, as well as long distances within them.  Plane travel within East Asia tends to be cheap by Western standards. In this example, you’ll learn how I was able to build an East Asian flight itinerary to 12 cities (3 countries) for under $750 using SkySurf.Travel!  Keep in mind, when building your own custom flight itinerary at SkySurf.Travel, prices may vary.  Flight prices change on a daily basis, so building the exact flight itinerary used in this example will not work.  You might get an even better deal than the one used in this example, or slightly more expensive, depending on the time you build your flight itinerary and travel route.  If you need assistance building a cheap travel itinerary, you can chat with our friendly online support, which can be found on the bottom right corner of the SkySurf.Travel homepage.  If live support is offline, you can leave a message and we’ll reply to you as soon as possible.

Here’s where I’ll be traveling to in East Asia for the total price of $739 (taxes included):

  • Beijing, China – starting point
  • Yantai, China – August 14, 2017 ($51)
  • Shanghai, China – August 18, 2017 ($79)
  • Wuhan, China – August 22, 2017 ($66)
  • Xiamen, China – August 26, 2017 ($63)
  • Hong Kong – September 1, 2017 ($67)
  • Fukuoka, Japan – September 6, 2017 ($36)
  • Naha, Japan – September 10, 2017 ($53)
  • Tokyo, Japan – September 14, 2017 ($60)
  • Daegu, South Korea – September 20, 2017 ($53)
  • Jeju Island, South Korea – September 25, 2017 ($24)
  • Seoul, South Korea – September 29, 2017 ($26)
  • Beijing, China – October 4, 2017 ($161)

That’s a total of 12 cities (3 countries).

Here’s a screenshot of my SkySurf.Travel East Asia travel itinerary (BookIt List):

East Asia Flight Itinerary (BookIt List)

And here’s a screenshot of my East Asian flight route which was automatically generated for me at SkySurf.Travel:

East Asia Flight Travel Route

Here’s how I got this super deal:

I first clicked on the “Multi-city” tab, then entered in “Beijing” in the “Traveling From” input field.  Next, I selected “August 2017” to find the cheapest flight departing Beijing, China in August 2017.  Finally, I clicked on the “Search Best Deals!” button and a list of the cheapest flights were displayed.

My cheapest flight option was to Yantai, China on August 13, 2017 for $51 USD.  I added this flight to my itinerary (BookIt List) by clicking on the “+Add to BookIt List” button.  A popup then appeared, such as the one below:

East Asia Next Flight Popup

I decided to stay in Yantai for 4 nights and selected the date August 18, 2017 for my departure.  I then clicked on the “To another destination” link and new results appeared.  My cheapest option was to Shanghai, China for $79. I added this flight to my itinerary by clicking on the “+Add to BookIt List” button, and repeated the above process until I was back in Beijing, China.

Certain countries in Asia require a visa upon arrival.  Be sure to do your research before booking flights to Asia.  You may need to apply for a visa before arriving in China.  Citizens of some countries, such as Bahamas, San Marino, Serbia, Fiji, Ecuador, and Barbados do not need a visa to enter China.

East Asia is one of the cheapest places on Earth for travelers — with lodging and food offered at very low prices, particularly for long term travel or for those willing to stay somewhere other than the big resort. East Asia has something for everyone and continues to lure thousands of backpackers to its beautiful lands and people year after year.

你好

Nǐ hǎo

Safe Travels!

Gregory Rzeczko

http://skysurf.travel/

How to Travel Brazil Cheap by Plane: 15 Cities for Under $900 in One Trip

Brazil is the largest country in South America and the 5th largest country in the world by land area.  It is an extraordinary country with beautiful people that’s rich in cultures, colors, flavors, languages, and customs.  Much of the Amazon Rainforest, the largest tropical rain forest in the world, covers northwestern Brazil.  The Amazon River, the longest river in the world, is considered to be the life force of the Amazon Rainforest and home to many plants and animals, such as the Boto (Amazon River dolphin), Amazonian manatee, giant river otter, and the infamous anaconda.

Map of Brazil
Map of Brazil

If you’re ever planning to visit the beautiful country of Brazil, keep reading this blog post on how to build the most economical flight itinerary using the online airfare deal finder tool: SkySurf.Travel.  I was able to build a single-trip flight itinerary composed of 15 cities in Brazil for the total price of $873 USD (including taxes).  That’s cheaper than many round-trip international flight tickets.  You can also use SkySurf.Travel to build the most cost-effective itinerary to anywhere in the world, from anywhere.  For more examples on how to save lots of money on flights to several other destinations, click on the blog links located on the left panel of this blog.

I’ll be starting my journey from Brasilia, Brazil (the capital of Brazil).  Here’s where I’ll be traveling to in Brazil for the duration of 2 months:

  • Brasilia, Brazil (starting point)
  • Belo Horizonte, Brazil – September 25, 2017 ($37)
  • Sao Paulo, Brazil – September 29, 2017 ($29)
  • Rio De Janeiro, Brazil – October 3, 2017 ($35)
  • Vitoria, Brazil – October 7, 2017 ($39)
  • Curitiba, Brazil – October 13, 2017 ($37)
  • Porto Alegre, Brazil – October 17, 2017 ($39)
  • Florianopolis, Brazil – October 21, 2017 ($44)
  • Belem, Brazil – October 26, 2017 ($70)
  • Santarem, Brazil – October 30, 2017 ($51)
  • Manaus, Brazil – November 3, 2017 ($76)
  • Porto Velho, Brazil – November 7, 2017 ($67)
  • Recife, Brazil – November 13, 2017 ($140)
  • Fortaleza, Brazil – November 17, 2017 ($70)
  • Salvador, Brazil – November 21, 2017 ($67)
  • Brasilia, Brazil – November 25, 2017 ($72)

Below is a screenshot of my complete SkySurf.Travel flight itinerary (BookIt List):

Brazil Flight Itinerary - BookIt List
Brazil Flight Itinerary – BookIt List

And here’s a screenshot of my entire flight route that was automatically generated for me at SkySurf.Travel:

Brazil Flight Map
Brazil Flight Map

Here’s how I got this super deal:

First, I clicked on the “Mutil-city” tab.  Next, I entered where I’ll be traveling from, which in this case is “Brasilia”.  I then selected my departure date; since I’m flexible with dates, I selected “September 2017” to find the cheapest flights in September 2017.  If you know your exact dates, you can select your exact travel dates.  Finally, I clicked on the “Search Best Deals!” button and a list of the cheapest flights were displayed.

My cheapest flight option was to Belo Horizonte on September 25, 2017 for $37 USD.  I added this flight to my itinerary (BookIt List) by clicking on the “+Add to BookIt List” button.  A popup then appeared, such as the one below:

Next flight (Brazil) popup

I decide to stay in Belo Horizonte for 4 nights and select the date September 29, 2017 for my departure.  I then click on the “To another destination” link and new results appear.  My cheapest option is to Sao Paulo for $29.  I add this flight to my itinerary by clicking on the “+Add to BookIt List” button, and repeat the above process until I’m back in Brasilia.  The above is just an example flight itinerary I’ve composed for this blog entry.  You can build your flight itinerary anyway you desire and select the destinations you want to travel to.  It’s possible to build an even cheaper itinerary than the one used for this example.

When visiting Brazil, here are a few of the best things to do:

  • Christ the Redeemer:  A must-see attraction in Rio that’s recognized as one of the New Seven Wonders of the World.
  • Iguazu Falls (Foz do Iguacu): The largest waterfalls system in the world.
  • Baia do Sancho (Fernando de Noronha): Baía do Sancho has been named the best beach in the world by Tripadvisor.
  • Rio da Prata (Bonito): Rio da Prata the 3rd clearest water in the world. Great amounts of underground limestone in this river filter the water and make it clear.
  • Theatro Municipal do Rio de Janeiro.  Built in the beginning of the twentieth century, it is considered to be one of the most beautiful and important theatres in the country.
  • Paraty Historic Centre (Rio de Janeiro):  Paraty´s Historic Center dates back to the years 1820s. The Historic Center, considered by UNESCO as “the most harmonious colonial architectonic set”, is declared a National Patrimony.
  • Amazon River Cruises: Cruise the Brazil Amazon River.
  • Amazon Rainforest Tours:  Journey into the heart of the most biodiverse place on the planet.

And plenty more to see and do!

Whatever you plan on doing in Brazil, whether it’s sightseeing or enjoying the nightlife, one thing for sure is you’ll never get bored.  Brazil is known for its gregarious and energetic population.  One of the best aspects of Brazilian culture is its music.  Dance the Samba, Carimbo, or Forro; or enjoy a Samba Show… whatever you like, Brazil awaits you!

Olá,

Gregory Rzeczko

http://skysurf.travel/

Travel 10 Cities in Africa for Cheap by Plane from Europe for under $1,550 in One Trip

Africa is a majestic continent.  From the vast deserts to the lush jungles, the picturesque coastlines to the craggy mountains; Africa is a place you need to explore and not miss. 

Africa Drakensburg-Mountains
Drakensburg – The main mountain range of Southern Africa

If you’re looking for a cheap multi-stop flight itinerary for Africa (or any continent for that matter), keep reading this blog post on how to save a lot of money on flights.  You’ll learn how to use SkySurf.Travel to build the most cost-effective multi-stop flight itinerary possible.

We’re going to compare prices with multi-stop flight itineraries that we can find on Google using the keywords: “Africa multi stop flights”.

Google search for "Africa multi stop flights"
Screenshot of first 2 Google results for keywords “Africa multi stop flights”

The first two results offer multi-stop flight itineraries for Africa.  The first result is Travel Nation.  You can fly to 4-5 cities in Africa from London for £999- £1,195 ($1,275-$1,525).  https://www.travelnation.co.uk/round-the-world-flights/africa-multi-stop-flights

The second result is KILROY. They offer a flight package to 6 cities in Africa from London, England for €1,400 ($1,565) for youth and students. http://travels.kilroy.net/flights/multi-stop-tickets/multi-stop-africa

At SkySurf.Travel, I was able to build an itinerary to 10 cities in Africa from London, England for $1,548 (£1,215) with taxes included.    That’s twice as many cities I’ll be visiting for about the same price.

Here’s how I did it:  I clicked on the “multi-city” tab, then entered in “London” in the “Traveling From” field.  Since I’m flexible with dates, I selected “August 2017” after clicking on the “Depart Date” field, and finally clicked on the “Search Best Deals!” button.

A list of the cheapest flight options returns.  I see a flight to Hurghada, Egypt (a beautiful place with very clean water, beaches and coral reefs, and wrecks of ships) on August 31, 2017 for $182.  I add this flight to my flight itinerary (BookIt List) by clicking on the “+Add to BookIt List” button. A pop-up then appears such as the one below:

Add Africa to flight itinerary

I decided to stay in Hurghada for 5 nights, so I selected September 5, 2017 and then clicked on the “To another destination” link.  A new list of results returns; this time with the cheapest flights from Hurghada on September 5th.  My cheapest flight option is to Cairo, Egypt for $47.  I add this flight to my BookIt List, and then repeat the above process until my final flight is back to London, England.

Here’s my complete flight itinerary (BookIt List):

Africa flight itinerary

Ten cities in Africa from North to South with a return trip back to London, England for a total of $1,548 (£1,215) with taxes included.   Here’s where I’ll be traveling to starting from London:

  • Hurghada, Egypt – August 31, 2017 ($182)
  • Cairo, Egypt – September 5, 2017 ($47)
  • Johannesburg, South Africa – September 10, 2107 ($163)
  • Harare, Zimbabwe – September 14, 2017 ($103)
  • Dar es Salaam, Tanzania – September 19, 2017 ($100)
  • Zanzibar – September 23, 2017 ($35)
  • Nairobi, Kenya – September 28, 2017 ($150)
  • Addid Ababa, Ethiopia – October 4, 2017 ($141)
  • Kigali, Rwanda – October 10, 2017 ($205)
  • Entebbe, Uganda – October 15, 2017 ($87)
  • Back to London, England – October 20, 2017 ($335)

Here’s my entire flight route (Flight Map):

Africa flight map route

You may need vaccinations, visas, and appropriate clothing before traveling to Africa.  It is highly recommended to do research of the country you will be visiting before booking any flights, such as travel advice, advisories, and warnings.

Africa is amazing and everyone should visit.  It has something for everyone.  If you do visit, make sure to take a ton of photos of Africa’s stunning landscapes, which are as diverse as the animal kingdom.

Safe travels!

Gregory Rzeczko

http://skysurf.travel/

Travel Russia for Cheap by Plane: 9 Cities for Less Than $650 in One Trip

Russia is the world’s largest country by landmass.  It includes nine different time zones and shares land borders with 14 neighboring countries.  Russia offers many natural sights, from the sandy Curonian Split on the Baltic Sea coast to the vast Golden Mountains of Altai in Southern Siberia. Whether you’re exploring the grounds of Moscow’s Kremlin or wandering the Hermitage Museum in Saint Petersburg, a visit to Russia will introduce you to the beauty of a land which is rich in culture and history.

Russia largest country map

Many people traveling to Russia are aware of the Trans-Siberian railway.  It is part of the longest railway system in the world running from Moscow to Vladivostok.  The line is known as the route of the tsars, begun in 1891 by Tsar Alexander III and completed by his son, Tsar Nicholas II, in 1916. According to an article from The Telegraph entitled, “Everything you need to know about booking a trip on the Trans-Siberian railway”, the cost for a one-way journey by service train to Vladivostok from Moscow, is about £500 ($644) in second class and £800 ($1,030) for first class, including food. Bedding is supplied in first- and second-class coaches.  If you plan on making stops in between, you’ll need to pay extra.

Trans Siberian railway map

For people who really want to see Russia, the Trans-Siberian Railway is a great way to get a good look at about 6,000 miles of it. But for those who’d rather fly, get to their destinations faster, and spend more time in cities than on a train, purchasing air ticket deals would be the better option.  And for those that like both can mix it around with trains and planes.

In this blog entry, I’ll be giving you an example of how to travel to 9 cities by plane for less than the price of a one-way Trans-Siberian rail ticket from Moscow to Vladivostok using the online flight deal tool SkySurf.Travel.  I’ll be beginning and ending my journey in Moscow, visiting 8 cities in between for the total price of $628 USD (taxes included).

Here’s how I got this super deal:  I first typed in “Moscow” in the “Traveling From” field, and then selected August 2017 in the “Depart Date” field.  Finally, I clicked on the “Search Best Deals!” button and a list of the cheapest flights returned departing from Moscow in August 2017.

My cheapest flight option is to Nizhniy Novgorod for $42 USD on August 9, 2017.  I added this to my itinerary (BookIt List) by clicking on the “+ Add to BookIt List” and a popup appears, such as the one below:

russia added to itinerary

I decided to stay in Nizhniy Novgorod for 4 nights, so I selected my departure date as August 13, 2017.  Then I clicked on the “To another destination” and a new list of results has returned.  You’ll be able to customize your trip anyway you like by repeating the same process as above until you reach your final destination.

Here’s where I’ll be traveling to for $628 USD (taxes included):

  • Moscow, Russia (starting point)
  • Nizhniy Novgorod – August 9, 2017 ($42)
  • St. Petersburg – August 14, 2017 ($62)
  • Rostov-on-Don – August 18, 2017 ($72)
  • Sochi – August 23, 2017 ($52)
  • Krasnodar – August 29, 2017 ($61)
  • Tyumen – September 4, 2017 ($170)
  • Novosibirsk – September 9, 2017 ($54)
  • Surgut – September 13, 2017 ($52)
  • Back to Moscow – September 19, 2017 ($63)

Here’s a screenshot of my Russian itinerary (BookIt List):

Russia cheap flight itinerary

And here’s a screenshot of my entire travel route (Flight Map):

Russia cheap flight map

Before visiting Russia, you will need to obtain a Russian tourist visa. For more information on how to obtain a visa to travel Russia, visit https://russia.travisa.com/.  Here’s a list of countries that do not require a visa to enter the Russian Federation: http://ru.vfsglobal.co.uk/visa_free_regime.html. You’ll also need to get an invitation (also called visa support), which is a special document issued by the party that invites you to Russia. The invitation is required by a Russian consulate to be able to process your visa.  The invitation (visa support) can be issued by a Russian travel agency, or by a company or organization authorized by the Russian Ministry of Foreign Affairs (MFA).  Here’s an in-depth article on “How to Get a Russian Visa” by The Points Guy, and a “Russian Visa Support Application: Step by Step Guide” by Way to Russia.  If you need help with Russian travel, you can message our friendly live online support at SkySurf.Travel.  You do not have to buy air tickets in order to get a visa but you should take the following into account:

  • If you apply for a visa before buying your tickets, it’s possible that you won’t be able to find flights for the exact dates for which you applied or they may be more expensive. Most often, the earlier you book your flights the cheaper they will be.
  • It is possible that you will purchase tickets in advance (if you’ve found a great deal or good price) and then not receive your visa. If you’re going as a tourist, have no criminal issues, have an invite and travel insurance, there’s very little chance of you being denied; however, it is not 100% guaranteed you’ll get a visa.
  • If you need to get a visa, you should begin the process at least 5 weeks ahead of time.

Privyet!

Gregory Rzeczko

http://skysurf.travel/

How to Book the Cheapest Flights

In this blog entry, you’ll learn how to find the cheapest flight deals possible to anywhere in the world using the flight deal website SkySurf.Travel.  This is an innovative online service for anyone who wants to go somewhere on a budget, but doesn’t know where exactly. It can also be used for finding the most economical flight path to multiple cities. For example, if your overall flight ticket budget is $500, you can view all your one-way, round-trip, or multi-city flight options for under $500.

One-way flights

Let’s say you’re looking to travel around the world, and looking for flight ticket deals whenever you are ready to depart a city.  For this example, I’ll be looking for flight deals under $100 departing from Beijing, China sometime in August 2017.  I enter in “Beijing” in the “Traveling From” input field, and select “August 2017” in the “Depart Date” field, and finally click on the “Search Best Deals!” button to retrieve a list of results of the cheapest flight deals for the month of August 2017.

Here are the results:

If I plan on staying in China, I can choose from 19 cities that I can fly to for under $100.

If I plan on leaving China, there are 4 countries I can fly to for under $100 (Malaysia, Hong Kong, Philippines, and South Korea).

You can also choose the exact date, and if you’re flexible, you can subtract or add days to your departure date by clicking on the left or right arrow buttons after your results appear, such as the ones below:

Change departure date by left or right arrows

Round-trip flights

There are a couple ways of finding the cheapest round-trip flight deals.  First, click on the “Roundtrip” tab, type in where you’ll be traveling from as well as your departure and return dates.  For this example, I’ll be traveling from New York, NY, USA, for one week, so I’ve selected August 16-23, 2017.  A list of flights returned that are sorted by cheapest to most expensive.  There are 17 countries I can travel to round-trip from NYC for under $500. Four of them are to Europe (Scotland, Ireland, Denmark, and Finland).

Another way of finding cheap round-trip flight deals is by repeating the above steps, but this time clicking on the “Show me two one-way tickets that I can book separately” option. You’ll be able to choose your return flight once you choose your departure flight. (This can at times be cheaper).  For this option, you’ll be able to see if booking two separate one-way flight deals is cheaper than purchasing a round-trip flight ticket.

If you’re flexible, you can also search by month to view the cheapest airfare for any month, or click the “anytime” option to see what the current cheapest destinations are for anytime.

In the top navigation, you can also click on the “Flight Map” button to view a world map of all the destinations you can fly to.  There’s a price range slider to select your max airfare price, and see where you can fly to on a world map.

Airport destination flight map

Multi-city flights

I’ve written a few blog entries on how to travel around the world or a continent to multiple cities in the most economical way. Here are a few:

The options are endless on finding your ideal and most cost-effective travel itinerary.  Whether you’re planning a cheap one-way, round-trip, or multi-city trip, SkySurf.Travel is the tool you’ll need to build the most economical flight itinerary to anywhere around the world.  If you need help with building your travel itinerary, there’s live online help at SkySurf.Travel.

Safe travels!

Gregory Rzeczko

http://skysurf.travel/

Cheap Round the World (RTW) Tickets – 15 Countries for under $1,500 in One Trip

The world is a majestic and wonderful place.  Being able to travel and explore the world and experience cultures is priceless and, in my humble opinion, the best thing you can spend your money on.

According to Nomadic Matt’s “The In-depth Guide to Buying an RTW Ticket” article, “RTW tickets prices range between $2,700-$10,000 USD, depending on your mileage, route, and number of stops, though a simple two- or three-stop RTW ticket might cost as little as $1,500 USD.”

He also mentions “you can find a better deal by booking through a third party such as Airtreks, STA Travel, or Flight Centre (OZ/NZ). Third party bookers don’t just deal with one alliance – they mix and match from all available airlines (excluding budget airlines) to find the lowest price, which saves you money.”

What if I told you can save even more money on RTW tickets with SkySurf.Travel?  There is no “they”, so you can customize your RTW trip ticket anyway you like online, and budget airlines are also included to save you even more money!  If you need help building your RTW travel itinerary, there’s live online help.  In this blog entry, you’ll learn how to save a ton of money on RTW tickets.  I’ll show you how you can travel to 15 countries around the entire world for under $1,500.  No mile points needed, and no strings attached. Some airlines charge an extra fee for larger baggage.  Make sure to check each airline’s baggage terms before booking your flights.

For this example, I’ll be starting my journey from New York, NY!  I enter in “NYC” in the “Traveling From” input field, and then select “July 2017” by clicking on the “Depart Date” input field to find the best deals in July 2017.  Finally, I click on the “Search Best Deals!” button and a list of results return.  I first want to travel to Europe and found a great deal to Edinburgh, Scotland for only $80!  The flight departs from Stewart International, which is about a $20 bus ride to get to from NYC.  I add this flight to my RTW itinerary (BookIt List) by clicking on the “+Add to BookIt List” button.  A popup then appears such as the one below:

I decide to stay in Edinburgh for 5 nights, so I select the date July 26, 2017.  I then find a great deal to Dublin, Ireland for only $38!  I add this flight to my BookIt List and repeat the above process until I’m back home in New York City.

Here’s where I’ll be traveling to for only $1,475 (taxes included):

  • New York, NY USA (Starting point)
  • Edinburgh, Scotland – July 21, 2017 ($80)
  • Dublin, Ireland – July 26, 2017 ($38)
  • Cardiff, Wales – August 1, 2017 ($33)
  • Madrid, Spain – August 6, 2017 ($49)
  • Milan, Italy – August 10, 2017 ($33)
  • Prague, Czechia – August 14, 2017 ($35)
  • Kiev, Ukraine – August 21, 2017 ($108)
  • Ankara, Turkey – August 25, 2017 ($56)
  • Tbilisi, Georgia – August 29, 2017 ($80)
  • Baku, Azerbaijan – September 1, 2017 ($51)
  • Tehran, Iran – September 6, 2017 ($52)
  • Kuala Lumpur, Malaysia – September 11, 2017 ($188)
  • Manila, Philippines – September 15, 2017 ($49)
  • Seoul, South Korea – September 19, 2017 ($114)
  • Los Angeles, CA USA – September 23, 2017 ($344)
  • New York, NY USA – September 27, 2017 ($165)

Here’s a screenshot of my entire RTW itinerary (BookIt List) below:

 
And here’s a screenshot of my entire travel route, which was generated at SkySurf.Travel:


This is just an example itinerary.  The options are endless for customizing your RTW travel itinerary anyway you desire.

Be sure to check out my other blog entries for tips and ways to save a ton of money on travel.  You’ll see many examples of how to travel the world in the most cost-effective way possible.


Happy travels!

Gregory Rzeczko
http://skysurf.travel/